Thursday, 27 March 2025

The Ultimate Guide to Air Conditioning Installation in Huntingdon for Homes & Businesses

As temperatures rise, having a reliable air conditioning system is essential for both homes and businesses in Huntingdon. Whether you’re installing an air conditioner for the first time or upgrading to a more efficient system, making the right choice can impact your comfort, energy bills, and indoor air quality.

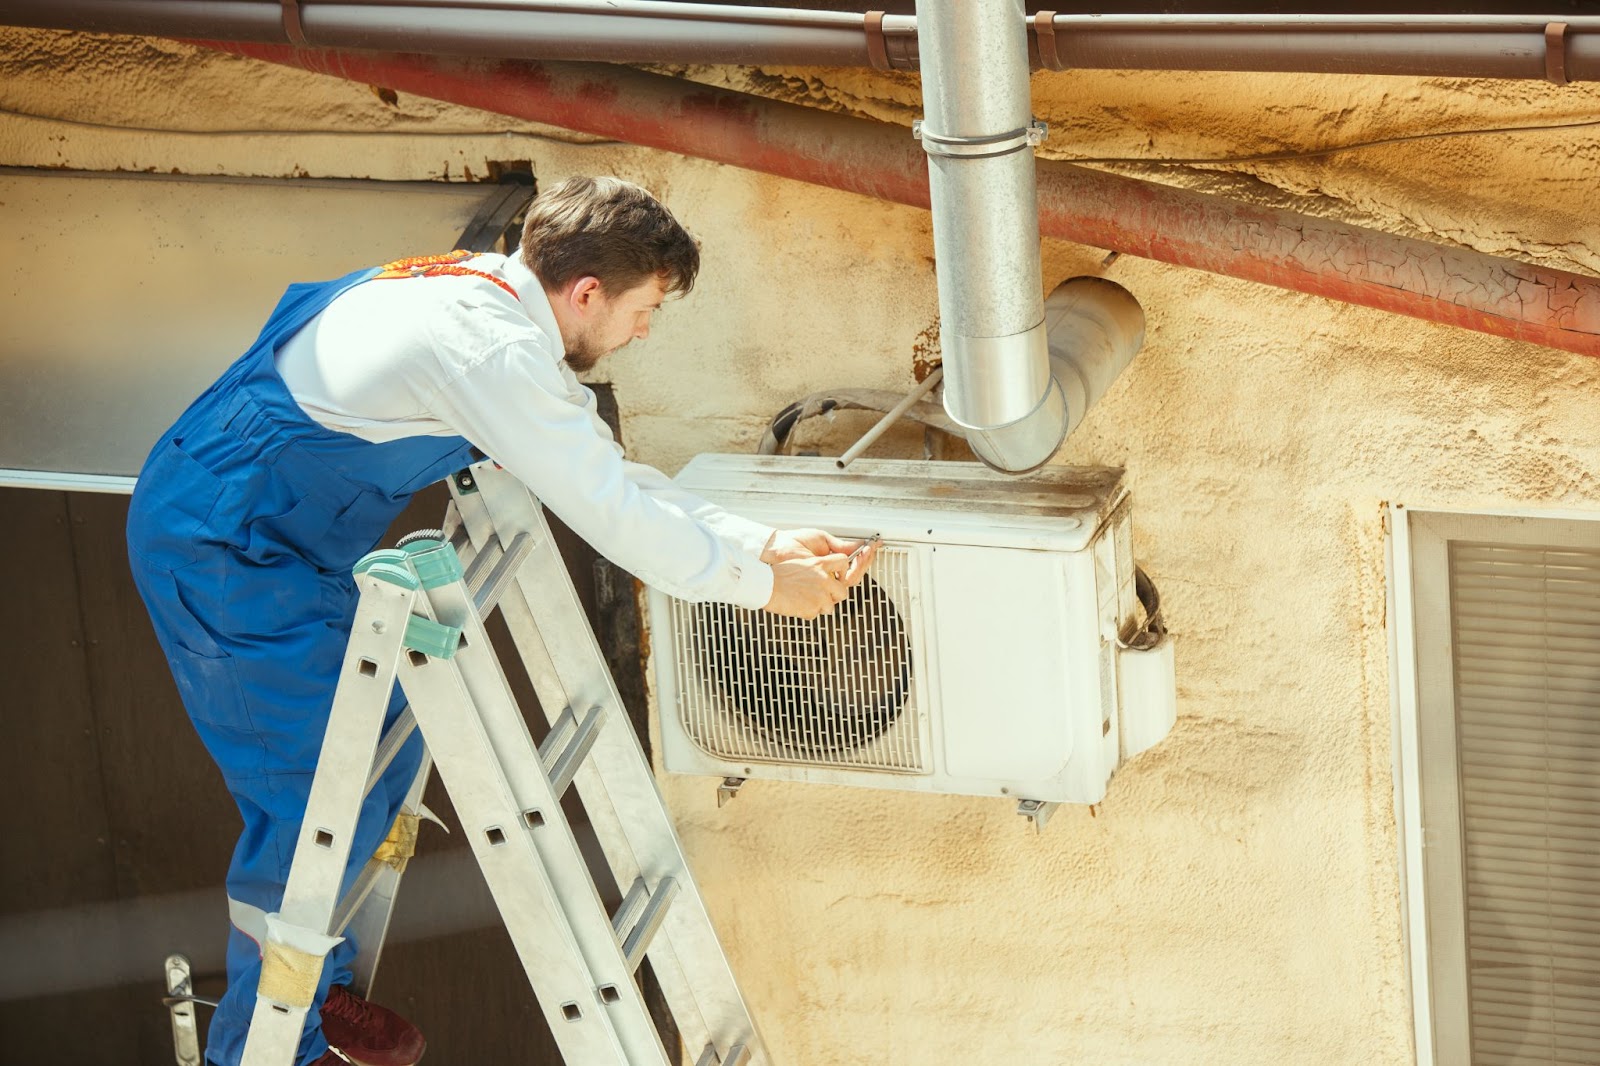
Air Conditioning Installation in Huntingdon

In this ultimate guide, we’ll walk you through everything you need to know about air conditioning installation in Huntingdon, from selecting the best unit to ensuring a smooth installation process.

Why Invest in Air Conditioning Installation in Huntingdon?

Installing an air conditioning system offers numerous benefits beyond just cooling your space. Here’s why it’s a smart investment:

  • Improved Comfort: Maintain a consistent and comfortable indoor temperature, even during the hottest months.
  • Better Air Quality: Modern AC systems come with advanced filtration, removing allergens and pollutants.
  • Energy Efficiency: Newer models consume less energy, reducing electricity bills and environmental impact.
  • Increased Property Value: Homes and businesses with efficient AC systems are more attractive to buyers and tenants.

Choosing the Right Air Conditioning System

Before proceeding with installation, you need to select the right AC system based on your space, budget, and cooling needs. Here are some common types:

1. Split Air Conditioning Systems

  • Best for individual rooms or small offices.
  • Comprises an indoor and outdoor unit.
  • Quiet operation and energy-efficient.

2. Ducted Air Conditioning Systems

  • Ideal for whole-home or large commercial spaces.
  • Provides even cooling throughout multiple rooms.
  • Requires ductwork installation.

3. Portable Air Conditioners

  • Suitable for temporary cooling solutions.
  • Easy to move and install.
  • Less efficient compared to permanent systems.

4. VRF/VRV Systems (Variable Refrigerant Flow/Variable Refrigerant Volume)

  • Designed for large buildings and commercial spaces.
  • Offers precise temperature control for different zones.
  • High energy efficiency and advanced technology.

Factors to Consider Before Air Conditioning Installation

To ensure a smooth installation, consider the following:

1. Room Size & Cooling Capacity

Choosing the right BTU (British Thermal Unit) rating is crucial. An undersized AC won’t cool efficiently, while an oversized unit may lead to high energy consumption. A professional installer can calculate the correct capacity for your space.

2. Energy Efficiency Ratings

Look for SEER (Seasonal Energy Efficiency Ratio) and EER (Energy Efficiency Ratio) ratings. A higher rating means better efficiency, lower energy costs, and a reduced carbon footprint.

3. Installation Location

  • Indoor Units: Should be placed away from heat sources and direct sunlight.
  • Outdoor Units: Need proper ventilation and should be positioned in a shaded area to improve efficiency.

4. Smart Features & Controls

Modern ACs come with Wi-Fi connectivity, programmable thermostats, and energy-saving modes that enhance convenience and efficiency.

5. Professional vs. DIY Installation

While DIY installation might seem cost-effective, professional installation ensures proper setup, compliance with safety standards, and long-term performance. A certified technician can handle wiring, refrigerant charging, and system testing.

The Air Conditioning Installation Process

Here’s a step-by-step look at what to expect during installation:

1. Site Inspection & Assessment

A professional technician will evaluate your space, electrical connections, and ventilation to recommend the best AC unit.

2. Preparing the Installation Area

  • Walls may need drilling for piping and electrical connections.
  • For ducted systems, ceiling spaces and walls will be prepared for ductwork.

3. Installing the Indoor & Outdoor Units

  • The indoor unit is mounted securely on a wall or ceiling.
  • The outdoor unit is placed on a stable surface for optimal airflow.

4. Connecting Electrical & Refrigerant Lines

Proper wiring ensures safety, while refrigerant lines are carefully installed to prevent leaks.

5. Testing & Final Adjustments

  • The technician will test the system for cooling efficiency and airflow.
  • Settings will be adjusted for optimal performance.

Cost of Air Conditioning Installation in Huntingdon

The cost depends on several factors:
  • Type of System: Split systems are generally cheaper than ducted or VRF systems.
  • Installation Complexity: Additional ductwork or electrical modifications can increase costs.
  • Brand & Features: Premium brands with smart features may cost more but offer better efficiency.

On average, air conditioning installation in Huntingdon ranges from £800 to £4,000, depending on the unit and installation complexity. Getting quotes from multiple installers can help you find the best deal.

Maintaining Your Air Conditioning System

Proper maintenance extends the lifespan of your AC and ensures efficient performance:

  • Regular Filter Cleaning: Clean or replace filters every 1-3 months.
  • Check Refrigerant Levels: Low refrigerant can reduce cooling efficiency.
  • Inspect Ductwork & Vents: Ensure there are no blockages or leaks.
  • Annual Professional Servicing: Schedule a yearly tune-up for optimal performance.

Final Thoughts

Investing in air conditioning installation in Huntingdon enhances comfort, improves air quality, and boosts property value. Whether for a home or business, choosing the right system and hiring a professional installer will ensure long-term efficiency and cost savings.

If you’re ready to install an air conditioning system, consult with a trusted Huntingdon AC installation expert to get the best advice and service tailored to your needs. Stay cool and enjoy the benefits of a high-performance air conditioning system!

For More Click Here: - https://www.reddit.com/user/airmanllc1/


Wednesday, 26 February 2025

Step-by-Step Guide to Installing a New Water Heater at Home

Installing a new water heater at home can be a cost-effective and rewarding project if done correctly. Whether you are replacing an old unit or upgrading to a more energy-efficient model, this step-by-step guide will walk you through the process to ensure a safe and successful installation.

Water Heater

Tools and Materials Needed

Before you begin, gather the following tools and materials:

  • Adjustable wrench

  • Pipe wrench

  • Screwdrivers

  • Plumber’s tape

  • Pipe cutter

  • Soldering torch (if installing a gas water heater)

  • Flexible water supply lines

  • T&P (temperature and pressure) relief valve

  • Gas line fittings (for gas heaters)

  • Electrical wiring tools (for electric heaters)

  • Bucket and towels

Step 1: Choose the Right Water Heater

First, determine the type of water heater that best suits your home’s needs. You can choose between:

  • Gas Water Heaters – Use natural gas or propane, requiring a venting system.

  • Electric Water Heaters – Use electricity and do not require venting.

  • Tankless Water Heaters – Provide hot water on demand, saving energy.

Consider the size of the unit based on household usage and energy efficiency ratings to reduce operating costs.

Step 2: Turn Off Utilities

For safety, turn off the power supply:

  • Electric Water Heater: Shut off the breaker in the electrical panel.

  • Gas Water Heater: Turn off the gas supply using the shutoff valve.

  • Close the cold water supply valve to prevent water flow during installation.

Step 3: Drain the Old Water Heater

  1. Connect a hose to the drain valve at the bottom of the old water heater.

  2. Place the other end of the hose in a bucket or floor drain.

  3. Open the drain valve and allow the tank to empty completely.

  4. Open a hot water faucet to help release pressure and drain faster.

Step 4: Disconnect the Old Water Heater

  1. Use a pipe wrench to disconnect the water supply lines.

  2. For gas heaters, carefully disconnect the gas line and remove the vent pipe.

  3. For electric heaters, detach the wiring using a screwdriver.

  4. Remove the old water heater and dispose of it according to local regulations.

Step 5: Position the New Water Heater

  1. Place the new water heater in the designated location.

  2. Ensure proper clearance from walls and combustible materials.

  3. Use a level to make sure the unit is stable.

Step 6: Connect the Water Supply Lines

  1. Wrap plumber’s tape around the threads of the water inlet and outlet pipes.

  2. Connect the flexible water supply lines and tighten them with a wrench.

  3. Open the cold water supply valve to fill the tank partially and check for leaks.

Step 7: Connect the Energy Source

  • Gas Water Heater:

    • Reconnect the gas line using proper fittings and a wrench.

    • Ensure the vent pipe is securely attached to prevent carbon monoxide leaks.

    • Turn on the gas supply and check for leaks using a soapy water solution.

  • Electric Water Heater:

    • Connect the wiring to the heater following the manufacturer’s instructions.

    • Secure connections with wire nuts and electrical tape.

    • Restore power at the breaker panel.

Step 8: Install the T&P Relief Valve

  1. Screw the temperature and pressure (T&P) relief valve into its designated port.

  2. Attach a discharge pipe that extends to the floor to safely release excess pressure.

Step 9: Fill and Test the Water Heater

  1. Open the cold water supply valve fully to fill the tank.

  2. Open a hot water faucet in the house to allow air to escape.

  3. Once water flows smoothly, close the faucet.

  4. Turn on the power or gas supply and adjust the thermostat to the desired temperature (120°F is recommended for efficiency and safety).

Step 10: Inspect for Leaks and Adjust Settings

  1. Check all connections for leaks and tighten if necessary.

  2. For gas heaters, ensure the pilot light is lit and functioning properly.

  3. Monitor the water heater for proper operation over the next few hours.

Conclusion

By following these steps, you can successfully install a new water heater at home. Proper installation ensures efficient operation, safety, and long-term performance. If you are unsure about handling gas lines or electrical wiring, consider consulting a professional plumber or electrician to assist with the installation. Regular maintenance will also help extend the life of your water heater and maintain its efficiency.

For More Click Here:- https://bsky.app/profile/airmanllc.bsky.social

Wednesday, 29 January 2025

How to Replace a Faulty Thermostat in a Room Heater

 A room heater is an essential appliance for keeping your home warm and comfortable, especially during colder months. However, if your heater is not maintaining the desired temperature, a faulty thermostat could be the culprit. Replacing a thermostat in a room heater is a straightforward process that can be done with basic tools and safety precautions. This guide will walk you through the steps to diagnose, remove, and replace a faulty thermostat in a room heater.

Signs of a Faulty Thermostat

Before replacing the thermostat, confirm that it is indeed the issue. Common signs of a malfunctioning thermostat include:

  • The heater does not turn on or off.

  • The temperature does not match the setting.

  • The heater runs continuously or cycles on and off frequently.

  • Inconsistent heating or cold spots in the room.

If you experience any of these problems, follow the steps below to replace your heater’s thermostat.

Tools and Materials Needed

To replace the thermostat, gather the following tools and materials:

  • Screwdrivers (Phillips and flathead)

  • Multimeter (for testing electrical continuity)

  • Wire cutters and strippers

  • Electrical tape

  • Replacement thermostat (compatible with your heater model)

  • Safety gloves and goggles

Step-by-Step Guide to Replacing a Faulty Thermostat

Step 1: Turn Off Power to the Heater

Before starting, ensure your safety by unplugging the heater from the power source. If your heater is hardwired, switch off the circuit breaker supplying power to the unit.

Step 2: Access the Thermostat

Most room heaters have a thermostat located inside the control panel. Use a screwdriver to remove the panel cover. Keep the screws in a safe place to reassemble the unit later.

Step 3: Locate and Inspect the Thermostat

Find the thermostat, which is typically a small box with electrical wiring connected to it. Check for visible damage such as burnt wires, corrosion, or loose connections.

Step 4: Test the Thermostat

Use a multimeter to check the continuity of the thermostat. Set the multimeter to the resistance (ohms) setting and place the probes on the thermostat terminals. If the reading does not change or shows infinite resistance, the thermostat is faulty and needs replacement.

Step 5: Remove the Faulty Thermostat

Carefully disconnect the wires connected to the thermostat. If the wires are soldered, use wire cutters to detach them. Make a note of the wire connections or take a picture to ensure proper reinstallation.

Step 6: Install the New Thermostat

Attach the wires to the terminals of the new thermostat. Ensure the connections are secure. If necessary, use wire strippers to expose fresh wire ends before attaching them. Wrap electrical tape around any exposed connections to prevent short circuits.

Step 7: Reassemble the Heater

After installing the new thermostat, place the control panel cover back and secure it with screws.

Step 8: Restore Power and Test the Heater

Plug the heater back into the power source or turn on the circuit breaker. Adjust the thermostat to the desired setting and observe its operation. The heater should turn on and off correctly in response to temperature changes.

Troubleshooting Tips

If the heater does not function correctly after replacing the thermostat:

  • Double-check the wiring connections.

  • Ensure the thermostat is compatible with your heater model.

  • Test the heater with another power outlet to rule out electrical issues.

  • Consult the heater’s user manual for additional troubleshooting steps.

Conclusion

Replacing a faulty thermostat in a room heater is a manageable DIY task that can restore your heater’s efficiency. By following these steps and taking the necessary safety precautions, you can ensure your home remains warm and comfortable throughout the season. If you encounter any difficulties, consider seeking professional assistance to avoid further damage or safety hazards.

For More Click Here:- https://www.provenexpert.com/en-us/airman/

Tuesday, 7 January 2025

How to Spot Common Water Heater Problems?

 Water heaters are essential appliances in modern homes, providing hot water for daily activities such as cooking, cleaning, and bathing. However, like any appliance, they are prone to wear and tear over time. Recognizing the signs of water heater problems early can save you from costly repairs or replacements. Here’s a comprehensive guide to spotting common water heater issues and understanding their underlying causes.

1. Insufficient Hot Water

Signs:

The water takes too long to heat.

You’re getting lukewarm water instead of hot water.

The hot water supply runs out quickly.

Causes:

Sediment Buildup: Over time, minerals from the water settle at the bottom of the tank, reducing its efficiency.

Faulty Heating Element: In electric water heaters, the heating element may wear out or malfunction.

Thermostat Issues: Incorrect thermostat settings or a broken thermostat can limit the temperature.

Solutions:

Flush the water heater tank regularly to remove sediment.

Check and replace the heating element if necessary.

Ensure the thermostat is set to the recommended temperature (120–140°F).

2. Strange Noises

Signs:

Popping, banging, or rumbling sounds coming from the water heater.

Causes:

Sediment Accumulation: When sediment builds up, it traps water beneath it. As the water heats, it creates a popping or banging noise.

Expanding Metal Parts: Natural expansion and contraction of metal components can also cause noise, though this is usually harmless.

Solutions:

Flush the tank to eliminate sediment.

If noises persist, consult a professional to inspect for potential damage.

3. Leaking Water

Signs:

Water pooling around the base of the water heater.

Visible dripping from the tank or attached pipes.

Causes:

Loose Connections: Pipes and fittings may become loose over time.

Corroded Tank: Corrosion inside the tank can lead to leaks.

Pressure Relief Valve Failure: Excessive pressure can cause the valve to release water.

Solutions:

Tighten loose connections using the appropriate tools.

Replace a corroded tank, as repairs are often not feasible.

Check the pressure relief valve and replace it if defective.

4. Discolored or Smelly Water

Signs:

Hot water appears rusty, brown, or cloudy.

Foul odors, such as a rotten egg smell, coming from the water.

Causes:

Rust or Corrosion: Rusty water indicates corrosion inside the tank or pipes.

Bacterial Growth: Sulfate-reducing bacteria can grow in the tank, especially if the temperature is too low.

Solutions:

Replace the anode rod, which helps prevent corrosion inside the tank.

Flush the tank with a mixture of water and hydrogen peroxide to kill bacteria.

Increase the water heater’s temperature to at least 140°F to prevent bacterial growth (ensure safety precautions).


5. Fluctuating Water Temperature

Signs:

Water alternates between hot and cold during use.

Causes:

Sediment in Tank: Sediment buildup can create hot spots, leading to inconsistent heating.

Thermostat Problems: A malfunctioning thermostat may not regulate the temperature effectively.

Solutions:

Flush the tank to remove sediment.

Inspect and recalibrate or replace the thermostat as needed.

6. Low Water Pressure

Signs:

Weak water flow from hot water taps.

Causes:

Sediment or Scale Buildup: Mineral deposits can clog the pipes and reduce water pressure.

Narrowing of Pipes: Over time, scale can accumulate in the pipes, restricting flow.

Solutions:

Install a water softener to minimize mineral buildup.

Flush the system to remove sediment.

Consider replacing old or heavily scaled pipes.

7. Water Heater Is Overheating

Signs:

Water is scalding hot.

Excessive steam or unusual sounds.

Causes:

Faulty Thermostat: A broken thermostat can cause the water to overheat.

Pressure Build-Up: Excessive pressure can make the water heater unsafe.

Solutions:

Lower the thermostat settings.

Inspect the pressure relief valve and ensure it is functioning properly.

Preventive Maintenance Tips

To avoid common water heater problems, regular maintenance is crucial:

Flush the Tank Annually: Remove sediment buildup to improve efficiency and longevity.

Inspect the Anode Rod: Replace it every 3–5 years to prevent corrosion.

Check Connections and Valves: Ensure all connections are secure and free from leaks.

Install a Water Softener: This helps reduce sediment accumulation, especially in hard water areas.

When to Call a Professional

While some water heater problems can be addressed with DIY methods, certain issues require professional attention:

Persistent leaks or rusting tanks.

Electrical or gas supply problems.

Water heater is not responding after basic troubleshooting.

If your water heater is more than 10–15 years old and experiencing frequent problems, it may be time for a replacement. Investing in a new, energy-efficient model can save you money on energy bills and reduce maintenance concerns in the long run.

Conclusion

Being proactive about water heater maintenance and understanding the signs of common issues can help extend its lifespan and prevent costly repairs. Whether it’s strange noises, leaking water, or inconsistent temperatures, identifying problems early ensures you always have reliable hot water. If in doubt, don’t hesitate to consult a professional to address complex or recurring issues.

For More Visit Us:- https://www.provenexpert.com/en-us/airman/


Friday, 13 December 2024

What should I do if my room heater is making noise?

 Room heaters are essential appliances, especially during colder months, ensuring your comfort and warmth. However, a noisy room heater can disrupt the peace of your home and may indicate potential issues requiring attention. Here’s a comprehensive guide to understanding and addressing the problem.

Types of Noises and Their Causes

Different noises can signal various problems with your room heater. Identifying the type of noise is the first step in resolving the issue. Here are the common noises and their potential causes:

  1. Banging or Popping Noises

    • Cause: This often results from the expansion and contraction of metal components due to temperature changes. It’s common in older heaters but could also indicate sediment buildup in the unit.


    • Solution: Regular maintenance, such as flushing out sediment, can reduce these noises. Consult the user manual for guidance or hire a professional.

  2. Whistling or Squealing Sounds

    • Cause: A high-pitched whistling or squealing noise typically points to airflow issues. This could be due to a clogged filter, a dirty fan, or restricted vents.

    • Solution: Check and replace the air filter if necessary, clean the fan blades, and ensure all vents are unobstructed.

  3. Buzzing Noises

    • Cause: Buzzing noises often originate from electrical components, such as a failing capacitor or loose wiring.

    • Solution: Turn off the heater and inspect the wiring. If you’re unfamiliar with electrical systems, it’s best to call an electrician or HVAC professional.

  4. Clicking Sounds

    • Cause: Clicking noises can occur when the thermostat cycles the heater on and off. While some clicking is normal, persistent or loud clicking may indicate a faulty relay or thermostat.

    • Solution: Inspect the thermostat settings and ensure they’re correct. If the clicking persists, replace the thermostat or contact a technician.

  5. Rattling or Vibrating Noises

    • Cause: Loose components, such as screws, panels, or fan blades, can cause rattling sounds. Vibrations may also result from improper placement on an uneven surface.

    • Solution: Tighten any loose parts and ensure the heater is placed on a flat, stable surface.

Steps to Troubleshoot a Noisy Room Heater

If your room heater is making unusual noises, follow these steps to identify and resolve the issue:

  1. Turn Off the Heater

    • Safety should always come first. Turn off the heater and unplug it from the power source before inspecting or repairing it.

  2. Inspect for Visible Issues

    • Look for loose screws, panels, or other components. Check the heater’s exterior for any visible damage or debris.

  3. Clean the Heater

    • Dust and debris can accumulate over time, causing noise and reducing efficiency. Use a vacuum or a soft brush to clean the heater’s vents and internal components gently.

  4. Check the Filter

    • If your heater has an air filter, inspect it for dirt or blockages. Replace the filter if it’s clogged or damaged.

  5. Test the Fan

    • A malfunctioning fan can produce unusual noises. Check the fan blades for debris or misalignment and clean or adjust them as needed.

  6. Ensure Proper Placement

    • Place the heater on a flat, stable surface. Use vibration-absorbing pads if necessary to minimize noise.

  7. Consult the Manual

    • Refer to the user manual for specific maintenance instructions and troubleshooting tips. Manufacturers often provide detailed solutions for common problems.

When to Call a Professional

While many heater noises can be resolved through basic troubleshooting, some issues require professional intervention. Contact a technician if:

  • The noise persists despite your efforts.

  • You suspect electrical issues or faulty wiring.

  • The heater shows signs of overheating or damage.

  • The warranty covers your unit, as unauthorized repairs may void the warranty.

Preventive Maintenance Tips

Regular maintenance can prevent many common heater problems, including noise. Here’s how to keep your heater in top condition:

  1. Clean the Heater Regularly

    • Dust and debris can accumulate and cause blockages or wear on components. Clean your heater every few months.

  2. Replace Filters Periodically

    • If your heater uses filters, replace them as recommended by the manufacturer.

  3. Inspect Components

    • Periodically check for loose screws, damaged parts, or signs of wear. Tighten or replace components as needed.

  4. Schedule Professional Servicing

    • Annual servicing by a qualified technician can identify and address potential issues before they become serious problems.

  5. Avoid Overuse

    • Allow your heater to rest periodically to prevent overheating and prolong its lifespan.

Safety Considerations

Addressing a noisy heater should always prioritize safety. Here are some precautions:

  • Turn Off Power: Always turn off and unplug the heater before inspecting or repairing it.

  • Use Correct Tools: Use appropriate tools and follow the manufacturer’s instructions.

  • Avoid DIY Electrical Repairs: If you suspect electrical problems, leave the repairs to a qualified professional.

  • Monitor for Odors: Unusual smells, such as burning, may indicate overheating or electrical issues. Turn off the heater and seek professional assistance immediately.

Conclusion

A noisy room heater can be inconvenient, but it’s often a sign of minor issues that can be resolved with proper maintenance and care. By identifying the type of noise and following the troubleshooting steps outlined above, you can restore your heater to optimal performance. If the problem persists, don’t hesitate to consult a professional to ensure your safety and comfort during the colder months.

For More Click Here:- https://www.patreon.com/airmanllc

Wednesday, 13 November 2024

How Can I Tell If My Air Conditioner Needs Repair?

 An air conditioning unit is essential in maintaining comfort, especially during hot seasons. However, like any complex appliance, air conditioners can develop issues over time. Knowing when your air conditioner needs repair can save you from discomfort, higher utility bills, or costly replacements. Here’s a guide to the top indicators that your AC unit may need professional repair.

1. Poor Airflow

Signs: Weak or inconsistent airflow through vents is a common issue that often points to a problem with the air conditioning unit’s compressor or ductwork.

Causes: This may result from a dirty filter, obstructed ductwork, or a failing blower motor.

Solution: Check and replace air filters regularly, as a clogged filter can restrict airflow. If the problem persists, consider having the ductwork inspected for obstructions.

2. Warm Air Blowing from Vents

Signs: If your AC blows warm air, despite being set to cooling mode, this is a clear indication of a problem.

Causes: This could stem from issues with the compressor, low refrigerant levels, or a faulty thermostat.

Solution: First, ensure the thermostat is set correctly. If the air is still warm, the unit may have a refrigerant leak or compressor issue that requires professional attention.


3. Unusual Noises

Signs: Banging, squealing, grinding, or rattling noises are all abnormal and can signal mechanical problems.

Causes: These sounds often occur when there’s a loose or broken component, such as a fan blade, motor bearing, or belt.

Solution: Turn off the unit and call a technician to avoid further damage. Running an AC with loose parts can lead to more costly repairs or even the need for a full replacement.

4. High Humidity Levels

Signs: If you notice increased indoor humidity levels, even when the AC is running, this could indicate a malfunction.

Causes: Air conditioners are designed to remove moisture as they cool the air. When this function fails, it’s usually due to issues with the evaporator coil or improper unit size.

Solution: Check for simple issues like a dirty air filter, which can block proper airflow. However, if the humidity problem persists, a professional technician may need to recalibrate or repair the unit.

5. Water Leaks Around the Unit

Signs: Puddles or moisture near your AC unit are indicators of a leak.

Causes: This can be caused by a blocked condensate drain line or a refrigerant leak.

Solution: Clear any clogs in the drain line and check the unit for damage. If refrigerant is leaking, call a professional, as this requires specialized handling and repair.

6. Unpleasant Odors

Signs: Foul or musty odors emanating from the air conditioner are never a good sign.

Causes: Musty smells can indicate mold growth within the ducts or the unit itself. A burning smell, on the other hand, may point to electrical or mechanical issues.

Solution: Change air filters and clean ducts regularly. Persistent odors, especially burning smells, require immediate attention from a technician, as they may pose a fire risk.

7. Frequent Cycling On and Off

Signs: Short cycling, where the AC turns on and off frequently, can reduce cooling efficiency and strain the system.

Causes: Possible causes include an oversized unit, refrigerant leaks, or a malfunctioning thermostat.

Solution: Ensure your thermostat is working correctly and positioned in an appropriate location. If the issue persists, have a professional inspect the unit for refrigerant issues or faulty components.

8. High Energy Bills

Signs: A noticeable spike in your utility bills without a corresponding increase in AC usage is often a red flag.

Causes: This can happen when the AC struggles to maintain temperature due to low refrigerant, dirty filters, or mechanical issues.

Solution: Start by replacing filters and scheduling routine maintenance. If high bills continue, a technician can diagnose more serious issues that may be impacting efficiency.

9. Thermostat Issues

Signs: If the thermostat fails to respond, or the temperature displayed doesn’t match the actual room temperature, your AC may not be able to operate as expected.

Causes: A faulty thermostat, wiring issues, or calibration problems can disrupt AC performance.

Solution: Try resetting the thermostat. If problems persist, consider upgrading to a programmable or smart thermostat, which can provide better control and energy efficiency.

10. Age of the Unit

Signs: Air conditioners typically last 10-15 years, depending on usage and maintenance.

Causes: An older unit may start experiencing frequent issues or have reduced efficiency.

Solution: Weigh repair costs against replacement costs. In many cases, replacing an aging unit with a new, energy-efficient model is more cost-effective than frequent repairs.

When to Call a Professional

If your air conditioner exhibits one or more of these signs, it’s wise to consult a professional. Ignoring small issues can lead to major malfunctions or expensive repairs. An annual maintenance check is a proactive approach to ensure your unit is running efficiently and identify potential problems before they escalate.

Final Thoughts

Keeping your air conditioner in top shape is crucial for a comfortable home environment and manageable energy bills. By staying alert to signs of wear and tear and addressing them promptly, you can extend the life of your AC unit and avoid emergency breakdowns during peak seasons. Routine maintenance, filter changes, and timely repairs can make all the difference in keeping your AC running smoothly and efficiently.

Visit Us:- https://www.producthunt.com/@airmanllc

Monday, 14 October 2024

What Should I Do If My AC Is Not Cooling?

 When your air conditioner (AC) stops cooling during a hot day, it can be incredibly frustrating. However, before panicking or rushing to call a technician, there are several things you can do to troubleshoot the problem. In many cases, AC issues can be resolved through simple steps without the need for professional intervention. Here’s an in-depth guide to help you understand what could be wrong with your AC and how to fix it.

1. Check Your Thermostat Settings

Before diving into technical troubleshooting, the first thing you should do is check the thermostat. It might sound obvious, but sometimes, the thermostat may have been accidentally set to the wrong mode or temperature.

Ensure it’s on "Cool" mode: Your AC should be set to "Cool" and not "Fan" or "Heat" mode.

Verify the temperature setting: Ensure that the temperature is set lower than the current room temperature.

Inspect the battery: If you’re using a battery-powered thermostat, replace the batteries and see if that helps. Sometimes a weak or dead battery can cause the AC to malfunction.

If the thermostat is correctly set and the AC is still not cooling, move on to the next step.

2. Inspect the Air Filter

A dirty air filter is one of the most common reasons why an air conditioner stops cooling efficiently. Over time, dust and debris can clog the filter, restricting airflow and causing the evaporator coil to freeze up. This prevents the AC from cooling properly.

Locate and check the filter: Find the air filter in your system, which is usually located behind the return air grille or inside the air handler.

Clean or replace the filter: If it looks dirty, either clean or replace it (depending on whether it’s reusable or disposable). You should replace your filter every 1-3 months, depending on usage and environmental factors like pet dander and dust.

Once the filter is clean, turn on the AC to see if it starts cooling again.

3. Examine the Circuit Breaker

Sometimes, the air conditioner may stop working because of an electrical issue. Check the circuit breaker to ensure that power is being supplied to the unit.

Locate the breaker panel: Find the electrical panel in your home and look for the breaker that controls the air conditioner.

Reset the breaker: If the breaker has tripped, reset it by switching it off and then back on. A tripped breaker can cut off power to the AC, making it seem like the unit is malfunctioning when it’s simply not getting power.

If the breaker continues to trip after resetting, you may have a larger electrical issue that requires a professional’s assistance.

4. Check for Frozen Evaporator Coils

When the evaporator coils inside your air conditioner freeze, the unit will struggle to cool the air. Frozen coils are often a result of restricted airflow (due to a dirty air filter) or low refrigerant levels.

Turn off the AC: If you suspect the coils are frozen, turn off the unit to allow them to thaw. This may take a few hours.

Check for visible frost: Inspect the coils for ice buildup by removing the access panel on the indoor unit.

If the coils frequently freeze, it could indicate a more serious issue with the refrigerant levels, and you’ll likely need to call a technician.

5. Inspect the Outdoor Unit (Condenser)

Your outdoor unit plays a crucial role in the cooling process. If the condenser is obstructed or dirty, the AC may not function correctly.

Ensure there are no obstructions: Check around the outdoor unit for debris such as leaves, grass, or dirt that may be blocking airflow.

Clean the condenser coils: Dirty condenser coils can reduce the AC’s cooling efficiency. Use a garden hose to gently clean the coils or call a technician for a professional cleaning if they are heavily soiled.

Regular maintenance of the outdoor unit can prevent cooling issues and extend the life of your system.

6. Check the Refrigerant Levels

Refrigerant is the substance that cools the air in your AC unit. If the refrigerant levels are low due to a leak, the air conditioner won’t be able to cool your home properly. Unfortunately, checking and refilling refrigerant is not something a homeowner can do on their own.

Signs of low refrigerant: If you notice warm air blowing from the vents or ice buildup on the refrigerant lines, your AC may be low on refrigerant.

Call a professional: Refrigerant levels should only be checked and refilled by a licensed technician. If you suspect a leak, it’s best to call an HVAC professional immediately.

7. Check the Air Ducts

Leaking or poorly insulated air ducts can cause cool air to escape before it reaches the rooms in your home. This results in uneven cooling or no cooling at all in some areas.

Inspect the ducts: Look for obvious signs of damage, such as disconnected or leaking ductwork in your attic or crawl space.

Seal any leaks: You can seal minor leaks using duct tape or mastic sealant, but larger issues may require professional help.

8. Look for a Faulty Fan Motor

The fan inside your AC helps to circulate air over the evaporator coil and throughout your home. If the fan motor is not working correctly, your AC won’t cool effectively.

Check for strange noises: If you hear unusual rattling or grinding sounds, it could indicate a fan motor problem.

Inspect the fan blades: Make sure the blades are free of debris and able to spin freely.

A malfunctioning fan motor will usually require professional repair or replacement.

9. Ensure the AC is Properly Sized

Sometimes the problem isn’t a malfunction but an improperly sized air conditioner. If the unit is too small for your home, it will struggle to keep up with the cooling demand, especially during extreme heat.

Evaluate your home’s cooling needs: If your AC is too small, consider upgrading to a larger unit that is better suited to your home’s size and layout.

An HVAC technician can assess your cooling needs and recommend the appropriate system.

10. Regular Maintenance is Key

Prevention is always better than a cure. Regular maintenance of your air conditioning system can help you avoid most of the issues mentioned above.

Schedule annual check-ups: Having a professional technician service your AC once a year can catch potential problems before they become costly repairs.

Clean and replace filters: Keeping the air filter clean will ensure better airflow and efficiency.

Conclusion

If your air conditioner is not cooling, there are several steps you can take to troubleshoot and potentially fix the issue. From checking your thermostat settings and air filter to inspecting the outdoor unit and refrigerant levels, these tips can help restore your AC’s cooling function. However, if these steps don’t solve the problem, it’s essential to call a professional technician for a thorough inspection and repair. Regular maintenance and proper care will keep your air conditioner running efficiently and ensure your home stays cool during the hottest months.

Tuesday, 10 September 2024

How Can I Improve Indoor Air Quality with HVAC?

Indoor air quality (IAQ) is a growing concern for homeowners and businesses alike. Poor IAQ can lead to respiratory issues, allergies, and general discomfort. One of the most effective ways to improve indoor air quality is by using an HVAC (Heating, Ventilation, and Air Conditioning) system. A well-maintained and properly equipped HVAC system can filter out pollutants, regulate humidity, and keep air circulating to ensure a healthy indoor environment.

In this article, we’ll discuss how you can improve indoor air quality using your HVAC system. By following these steps and taking a proactive approach to maintenance, you can create a healthier, more comfortable indoor environment.

1. Regular HVAC Maintenance

Maintaining your HVAC system is the cornerstone of improving indoor air quality. Routine maintenance ensures that the system runs efficiently and effectively filters out contaminants. Here are key maintenance tasks to prioritize:

Changing air filters: HVAC filters capture dust, allergens, and other pollutants. However, when filters become clogged, they lose their effectiveness. It’s recommended to replace filters every 1 to 3 months, depending on usage and the type of filter.

Professional inspection: Schedule an annual or bi-annual inspection with an HVAC professional to ensure all components are functioning properly. A technician will check for any leaks, ensure proper airflow, and make sure that the system is free of debris.

Cleaning ducts and vents: Over time, dust, pollen, and other particles can accumulate in air ducts, leading to poor air quality. Regularly cleaning ducts and vents can prevent the spread of these pollutants. If you've never had your ducts cleaned, it may be a good idea to consult a professional.

2. Upgrade Your Air Filters

Not all air filters are created equal. HVAC systems come with different filter options, each with varying levels of filtration. A high-quality air filter can significantly improve indoor air quality by capturing smaller particles, such as pollen, dust mites, and even some bacteria.

MERV rating: Air filters are rated on the Minimum Efficiency Reporting Value (MERV) scale, which ranges from 1 to 20. The higher the MERV rating, the more efficient the filter is at capturing small particles. For residential homes, a MERV rating between 8 and 13 is ideal. Anything higher may restrict airflow and cause strain on the HVAC system.


HEPA filters: If you have family members with asthma or allergies, consider upgrading to a High-Efficiency Particulate Air (HEPA) filter. These filters capture 99.97% of particles as small as 0.3 microns, making them one of the most effective options for improving air quality.

Activated carbon filters: For homes with pets, smokers, or chemical sensitivities, activated carbon filters can help absorb odors and harmful gases, improving the overall indoor air quality.

3. Use UV Lights for Additional Protection

Installing UV (ultraviolet) lights within your HVAC system can add an extra layer of protection against airborne contaminants. UV lights work by destroying microorganisms such as bacteria, mold spores, and viruses that can circulate in the air and cause health problems.

Coil sterilization: UV lights can be installed near the evaporator coils in the HVAC system to prevent mold and bacteria from growing on the moist surfaces. This helps to keep the air clean and reduces the risk of spreading harmful pathogens.

Air sterilization: Some HVAC systems can be equipped with UV lights that sterilize the air as it moves through the system. This is particularly useful for homes with individuals who have compromised immune systems or respiratory conditions.

4. Control Humidity Levels

Maintaining proper humidity levels is crucial for both comfort and indoor air quality. High humidity levels can promote mold growth, dust mites, and other allergens, while low humidity can dry out nasal passages, causing irritation and making you more susceptible to infections.

Dehumidifiers: If your home tends to be humid, particularly during the summer months, consider adding a dehumidifier to your HVAC system. Dehumidifiers work by removing excess moisture from the air, keeping humidity levels in the ideal range of 30-50%.

Humidifiers: On the other hand, if you live in a dry climate, or experience dry winters, installing a humidifier can help maintain a comfortable level of moisture in the air. Proper humidity levels will not only improve air quality but also protect wooden furniture and floors from cracking.

5. Improve Ventilation

Proper ventilation is essential to improving indoor air quality. Stagnant air can trap pollutants, leading to poor IAQ. Your HVAC system can be equipped with features that enhance ventilation and ensure a steady flow of fresh air.

Energy Recovery Ventilators (ERVs) and Heat Recovery Ventilators (HRVs): These devices work with your HVAC system to exchange stale indoor air with fresh outdoor air. While doing this, they also retain heat (or cool air) from the exhaust to improve energy efficiency. ERVs and HRVs are particularly useful in well-insulated, airtight homes.

Exhaust fans: In high-moisture areas such as bathrooms and kitchens, make sure to use exhaust fans to remove excess humidity and odors. These fans help improve ventilation and prevent pollutants from accumulating indoors.

6. Keep Your HVAC System Running

It might seem counterintuitive, but turning your HVAC system off for extended periods can lead to poor air quality. When your system is off, air becomes stagnant, allowing dust, allergens, and pollutants to settle. By running the system continuously or setting it to "fan" mode, you can keep the air circulating, reducing the buildup of airborne contaminants.

Modern HVAC systems often have programmable thermostats that allow you to adjust the fan speed and schedule airflow. Using these features effectively can help maintain a healthy indoor environment without overworking the system.

7. Consider an Air Purification System

An air purifier can be an excellent addition to your HVAC system, especially if you live in an area prone to pollution or have specific health concerns like asthma or allergies.

Whole-home air purifiers: These systems are installed directly into the HVAC unit and work in conjunction with air filters to remove even smaller particles from the air. Depending on the model, some purifiers use a combination of HEPA filtration, activated carbon, and UV light to achieve comprehensive air cleaning.

Conclusion

Improving indoor air quality with your HVAC system is not only about comfort but also about protecting the health of your household. By ensuring regular maintenance, upgrading filters, controlling humidity, and enhancing ventilation, you can create a cleaner, healthier living environment. Additionally, investing in air purifiers or UV lights can further reduce the presence of harmful particles and pathogens.

By taking these steps, you can make a significant impact on the quality of the air you and your family breathe every day.

Tuesday, 13 August 2024

How Can I Improve Indoor Air Quality with HVAC?

 Improving indoor air quality (IAQ) is crucial for maintaining a healthy living environment, particularly in homes and offices where people spend a significant amount of their time. HVAC (Heating, Ventilation, and Air Conditioning) systems play a vital role in regulating indoor air quality. Proper maintenance, upgrades, and usage of your HVAC system can significantly enhance the quality of the air you breathe. Here’s how you can improve indoor air quality with your HVAC system:

1. Regular HVAC Maintenance

Regular maintenance of your HVAC system at Air Man, LLC is one of the most effective ways to ensure good indoor air quality. Over time, dust, dirt, and other pollutants can accumulate in your HVAC system, particularly in the ducts, filters, and coils. These contaminants can then be circulated throughout your home or office, reducing air quality.

Filter Replacement: The air filter in your HVAC system is designed to trap dust, pollen, and other airborne particles. However, if the filter becomes clogged, it not only reduces the system's efficiency but also allows pollutants to recirculate. It is recommended to replace or clean the filter every 1-3 months, depending on the type of filter and the level of contaminants in your environment.


Duct Cleaning: Over time, dust, mold, and other contaminants can build up in the ductwork of your HVAC system. Professional duct cleaning can remove these pollutants, preventing them from being blown into your living spaces. Consider having your ducts inspected and cleaned every 3-5 years.

Coil Cleaning: The evaporator and condenser coils in your HVAC system can collect dust and mold. Cleaning these coils regularly ensures that they operate efficiently and do not contribute to poor air quality.

2. Upgrading Air Filters

Standard HVAC filters are designed to protect the system from large particles, but they may not be effective in removing smaller, harmful pollutants such as mold spores, bacteria, and viruses. Upgrading to a higher-efficiency filter, such as a HEPA (High-Efficiency Particulate Air) filter, can significantly improve indoor air quality by capturing these smaller particles.

MERV Ratings: Filters are rated by their Minimum Efficiency Reporting Value (MERV), which ranges from 1 to 20. Higher MERV ratings indicate better filtration. For most residential HVAC systems, a MERV rating between 8 and 13 is sufficient, but if you are particularly concerned about air quality, consider a filter with a MERV rating of 13 or higher.

3. Controlling Humidity Levels

Humidity plays a significant role in indoor air quality. High humidity levels can lead to the growth of mold and mildew, while low humidity can cause respiratory irritation and dry skin. Your HVAC system can help regulate indoor humidity, improving overall air quality.

Dehumidifiers: If your home is prone to high humidity, especially in the summer months, consider installing a dehumidifier in conjunction with your HVAC system. This will help reduce moisture levels, preventing mold growth and making your home more comfortable.

Humidifiers: In contrast, during the winter months, indoor air can become too dry. A humidifier can add moisture to the air, preventing the issues associated with low humidity, such as dry skin, respiratory problems, and static electricity.

4. Incorporating UV Light Systems

Ultraviolet (UV) light systems can be installed within your HVAC system to kill bacteria, mold, and viruses that might be circulating in the air. These systems are particularly effective in reducing microbial contamination in the coils and air ducts.

UV Germicidal Lights: These lights are installed inside the HVAC unit, typically near the evaporator coil, where they can continuously disinfect the air as it passes through. This helps in reducing airborne pathogens and allergens, leading to better indoor air quality.

5. Installing an Air Purification System

Air purifiers can be integrated with your HVAC system to further enhance indoor air quality. These systems use advanced filtration technologies, including activated carbon filters and electrostatic precipitators, to remove a wide range of pollutants, including volatile organic compounds (VOCs), smoke, and odors.

Whole-House Air Purifiers: Unlike portable air purifiers, whole-house systems are connected directly to your HVAC system and treat the air throughout your entire home. This ensures that every room benefits from cleaner, fresher air.

6. Ensuring Proper Ventilation

Ventilation is essential for maintaining good indoor air quality. Your HVAC system should be capable of providing adequate ventilation, particularly in areas prone to higher pollution levels, such as kitchens and bathrooms.

Exhaust Fans: Ensure that exhaust fans in the kitchen, bathroom, and laundry room are functioning correctly and venting air outside. This helps in removing pollutants, moisture, and odors from these areas, reducing the overall pollutant load on your HVAC system.

Fresh Air Intake: Some HVAC systems can be equipped with fresh air intakes that bring in outdoor air, diluting indoor pollutants. This is especially important in tightly sealed homes where natural ventilation is limited.

7. Regular Inspection of HVAC Components

Periodic inspection of your HVAC system's components is crucial for maintaining optimal air quality. This includes checking the system for any leaks, ensuring that all seals are tight, and inspecting the refrigerant levels.

Professional Inspections: Have a professional HVAC technician inspect your system annually. They can identify potential issues before they become major problems, ensuring that your system operates efficiently and provides clean air.

8. Smart HVAC Controls

Modern HVAC systems can be equipped with smart controls that monitor indoor air quality and adjust the system's operation accordingly. These controls can optimize the use of air filters, regulate humidity, and even alert you when maintenance is required.

Smart Thermostats: Smart thermostats with IAQ monitoring capabilities can help you maintain a comfortable and healthy indoor environment by automatically adjusting settings based on real-time air quality data.

Conclusion

Improving indoor air quality with your HVAC system involves a combination of regular maintenance, upgrades, and smart usage. By ensuring that your system is well-maintained, using high-quality filters, controlling humidity, and incorporating air purification technologies, you can significantly enhance the air quality in your home or office. A clean, well-functioning HVAC system not only provides comfort but also promotes better health by reducing exposure to airborne pollutants.

Sunday, 2 June 2024

How to Choose the Right AC Repair Service in Huntingdon Valley

Is your air conditioning unit acting up again? It’s frustrating, isn’t it? But don’t worry, because in this comprehensive guide, we’ll walk you through the process of finding the perfect AC repair service in Huntingdon Valley. With so many options out there, it can be overwhelming to choose the right one. But fear not, by following these simple steps, you’ll be able to make an informed decision and ensure your AC gets the attention it deserves.

Understanding Your Needs

Before you start your search for an AC repair service, it’s important to understand your needs. Is your AC unit making strange noises? Is it blowing warm air instead of cold? Identifying the problem will help you communicate effectively with the repair service and ensure they can address the issue promptly.

Researching Your Options

Now that you know what you need, it’s time to start researching AC repair services in Huntingdon Valley. Take advantage of online resources such as Google and Yelp to find reputable companies in your area. Pay attention to reviews and ratings from previous customers to get an idea of the quality of service each company provides.

Checking Credentials

Once you’ve narrowed down your options, it’s time to dig a little deeper. Check to see if the AC repair service is licensed and insured. This not only ensures that they are qualified to perform the work but also protects you in case something goes wrong during the repair process.

Asking for References

One of the best ways to gauge the quality of an AC repair service is by asking for references. Reach out to friends, family, and neighbors who have used AC repair services in the past and ask about their experiences. Word of mouth recommendations can be invaluable when making your decision.

Getting Estimates

Before you commit to any one AC repair service, it’s important to get estimates from multiple companies. This will give you a better idea of what the average cost of repairs should be and help you avoid overpaying for services. Be sure to ask for a detailed breakdown of the costs so you can compare apples to apples.

Checking for Warranties

When choosing an AC repair service, it’s important to inquire about warranties on both parts and labor. A reputable company will stand behind their work and offer warranties to protect you in case the same issue arises again shortly after the repair is completed.

Considering Experience

Experience matters when it comes to AC repair. Look for a company that has been in business for several years and has a proven track record of successfully repairing a variety of AC units. An experienced technician will be able to diagnose and fix the problem quickly, saving you time and money in the long run.

Evaluating Customer Service

Last but not least, don’t overlook the importance of good customer service. Pay attention to how the AC repair service treats you from the moment you contact them. Are they responsive to your inquiries? Do they take the time to answer your questions thoroughly? A company that values customer service is more likely to provide a positive experience overall.

Conclusion

Selecting the ideal AC repair service in Huntingdon Valley need not feel overwhelming. By adhering to these straightforward steps, you can locate a trustworthy company like Air Man, LLC that will swiftly restore your AC to its optimal functioning. Start by conducting thorough research, seeking out references from friends or online reviews, and obtaining estimates from multiple providers. With just a bit of diligence, you can rest assured that your AC is entrusted to capable hands, ensuring your summer is filled with refreshing, cool air.


Monday, 6 May 2024

Who Can Benefit from HVAC Services Southampton?

 If you're a homeowner or a business owner in Southampton, you know how crucial it is to maintain a comfortable indoor environment, regardless of the weather outside. This is where HVAC (Heating, Ventilation, and Air Conditioning) services come into play. Whether you're dealing with scorching summers or chilly winters, having a reliable HVAC system is essential for maintaining optimal indoor comfort. But who exactly can benefit from HVAC services in Southampton? Let's delve into it.

Homeowners

For homeowners in Southampton, HVAC services are indispensable. Your home is your sanctuary, and you want it to be a place of comfort and relaxation. Whether it's ensuring your heating system is functioning efficiently during the winter months or keeping your air conditioning running smoothly throughout the summer, HVAC services ensure that your home remains a haven all year round. From installation to maintenance and repairs, HVAC professionals cater to the unique needs of homeowners, ensuring their systems are operating at peak performance.

Business Owners

Business owners in Southampton also rely heavily on HVAC services to maintain a conducive environment for their employees and customers. In commercial settings, proper heating, ventilation, and air conditioning are not just about comfort but also about productivity and profitability. A well-maintained HVAC system ensures that employees can work efficiently without being affected by extreme temperatures, while customers are more likely to linger and make purchases in a comfortable environment. HVAC services for businesses encompass everything from installation in new constructions to regular maintenance and emergency repairs to minimize downtime.

Property Managers

Property managers overseeing residential or commercial properties in Southampton understand the importance of keeping tenants happy and satisfied. One of the key aspects of tenant satisfaction is ensuring that their living or working spaces are comfortable year-round. HVAC services play a vital role in achieving this goal. Property managers often partner with HVAC companies to handle the installation, maintenance, and repairs of HVAC systems across their properties. By entrusting these tasks to professionals, property managers can focus on other aspects of property management while ensuring that tenants' comfort needs are met.

Facility Managers

Facility managers responsible for maintaining the operations of large buildings or facilities also rely on HVAC services to ensure smooth functioning. From office buildings to hospitals to manufacturing plants, maintaining optimal indoor conditions is crucial for both occupants and equipment. HVAC services cater to the specific requirements of each facility, whether it involves complex zoning systems, specialized filtration, or energy-efficient solutions. Facility managers work closely with HVAC experts to develop customized maintenance plans and respond promptly to any issues that may arise, minimizing disruptions to operations.

Conclusion

In conclusion, HVAC services in Southampton cater to a wide range of individuals and entities, including homeowners, business owners, property managers, and facility managers. Whether it's ensuring residential comfort, enhancing commercial productivity, satisfying tenant needs, or maintaining facility operations, HVAC professionals play a vital role in keeping indoor environments comfortable and functional. By entrusting their HVAC needs to experienced professionals, individuals and organizations can enjoy peace of mind knowing that their systems are in good hands. So, if you're in Southampton and in need of HVAC services, don't hesitate to reach out to reliable professionals who can meet your needs with expertise and efficiency. Contact Air Man, LLC - Heating & Cooling Services for all your HVAC requirements.


Monday, 25 March 2024

Southampton Boiler Replacement: A Step-by-Step Guide


Experiencing problems with your Southampton boiler? Considering a replacement but feeling uncertain about where to begin? Don't worry, because we've got your back! In this detailed guide, we'll take you through each step of the process for replacing your boiler in Southampton, guaranteeing a seamless transition to a heating system that's both more efficient and dependable. Get ready for hassle-free boiler replacement in Southampton!

Understanding the Need for Boiler Replacement

Before delving into the replacement process, it's imperative to comprehend the reasons that may necessitate replacing your boiler. Common factors include age-related deterioration, frequent breakdowns, inefficiency resulting in elevated energy bills, or a preference for upgrading to a more environmentally friendly and energy-efficient model.


If you're encountering any of these issues or if your boiler is over 10-15 years old, it's likely the opportune moment to contemplate a replacement. Opting for a new boiler not only improves your comfort but also augments the value of your property while diminishing your carbon footprint. And with Air Man, LLC - Heating & Cooling Services, you can trust in expert assistance every step of the way.

Initial Assessment and Consultation

The first step in the boiler replacement process is to schedule an initial assessment with a reputable heating engineer or boiler installation company in Southampton. During this consultation, a qualified professional will inspect your current boiler system, assess its condition, and discuss your heating requirements and preferences.

Be sure to communicate any specific needs or concerns you have regarding the replacement. Whether it's opting for a more energy-efficient model, switching to a different fuel type, or accommodating additional features like smart thermostats, the consultation stage is the perfect opportunity to address these aspects.

Choosing the Right Boiler

With the help of your heating engineer, you'll need to select a suitable replacement boiler that meets your heating demands and fits within your budget. Consider factors such as the size of your property, hot water usage, preferred heating controls, and energy efficiency ratings (such as the ErP rating) when making your decision.

There are various types of boilers available, including combi boilers, system boilers, and regular boilers, each with its own set of advantages and applications. Your heating engineer will advise you on the most suitable option based on your individual requirements.

Site Preparation and Boiler Installation

Once you've chosen the right boiler for your home, the installation process can begin. Prior to installation day, ensure that the designated area for the new boiler is cleared and accessible to the engineers. This may involve removing any clutter or obstacles near the existing boiler location.

On the day of installation, the heating engineers will arrive at your property equipped with the necessary tools and equipment. They'll begin by disconnecting and removing the old boiler before proceeding with the installation of the new unit. This typically involves connecting pipework, flues, and electrical components, as well as testing the system for leaks and proper functionality.

Testing and Commissioning

After the new boiler is installed, it's essential to conduct thorough testing and commissioning to ensure that everything is functioning correctly. This includes checking for any leaks, verifying that all components are operating as intended, and testing the heating and hot water systems under various conditions.

During this phase, your heating engineer will also provide you with instructions on how to operate and maintain your new boiler effectively. It's crucial to follow these guidelines to maximize efficiency, prolong the lifespan of your boiler, and ensure safety.

Final Checks and Handover

Once testing and commissioning are complete, the engineers will perform final checks to ensure that everything is in order. This includes verifying that all controls are working correctly, checking for any signs of issues or defects, and confirming that the boiler meets safety regulations and manufacturer specifications.

Before leaving your property, the engineers will provide you with all relevant documentation, including warranty details, compliance certificates, and user manuals. Take the time to review this information carefully and address any questions or concerns you may have before the engineers depart.

Conclusion

Replacing your boiler in Southampton doesn't have to be a daunting task. By following this step-by-step guide and working with experienced professionals, you can upgrade to a more efficient and reliable heating system with ease. Remember to prioritize regular maintenance and servicing to keep your new boiler running smoothly for years to come. Say goodbye to chilly winters and hello to cozy comfort with a brand-new boiler replacement!


The Ultimate Guide to Air Conditioning Installation in Huntingdon for Homes & Businesses

As temperatures rise, having a reliable air conditioning system is essential for both homes and businesses in Huntingdon. Whether you’re ins...